I guess I can start that single-lever paddle during this pandemic… since I finished the tape measure yagi today! It was a pleasant day weather-wise, and I loved being in the barn workshop looking out into the field whenever I needed a break.
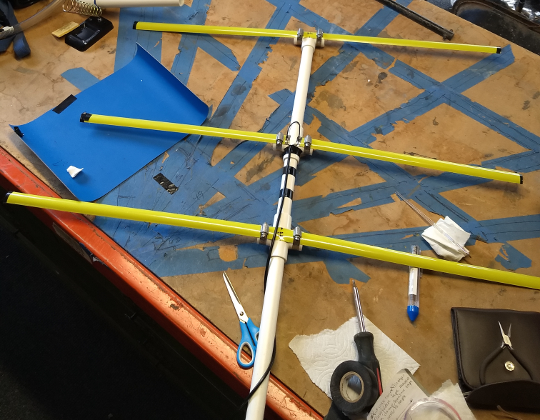
Construction of the driven element
You only work as well as your weakest link… And that weakest link was my soldering iron.
I spent about 6 hours, minus a lunch break and a couple pee breaks. Most of the day was staging my “mise en place” for soldering–twisting wires, carefully placing things in place, then a few mins of soldering (mostly making mistakes), unplugging my soldering iron when it got too hot, then re-staging everything.
Oh boy, do I absolutely regret grabbing my cheap-o soldering iron! It’s not even the iron that’s giving me problems, it’s the cheap tips that it came with. They disintegrate when they get too hot. Good thing they included 5. Yup. I don’t even have a fume extractor yet so I’m sure I’ve breathed in a lot of fun metals.
After reading that most good soldering tips will last you years…I’ve been facepalming myself ever since discovering what was happening to my tips.
Oh, and I didn’t even mention that the soldering iron would get too hot about oh, every 3 minutes, and that’s at the iron’s lowest setting (200C), though who knows if that dial even works.
I can not wait to try the irons I left at the shop.
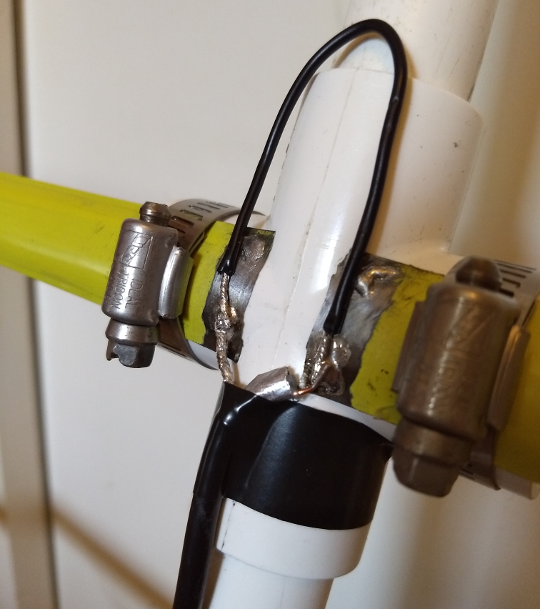 Now that I’ve chronicled how much of a PITA my soldering iron is, I was not confident about the join on the hairpin match–that’s the 18 gauge wire that’s bent in half in the middle, coax cable, and tape measure for the driven element. Three things to connect and only two hands, plus the stupid curve of the tape measure, was the reason why I had to re-stage and re-stage my soldering attempts.
But does it work??
Yes it does!!
Satellites
After dinner, I looked up some satellites, and my dad moved the antenna around while I referenced the Heavens Above app and fiddled with the radio. We didn’t have much luck with either satellite I was hoping for (Kaituo 1B and XW-2F), though we did catch some CW-ish sounding static about the same time and general direction as the pass for XW-2F.
Nets
My plan for the rest of the night after that was to listen in on a couple of nets. And since it started raining right as we came inside, I decided this was a good time to see how the antenna fared indoors in the coziness of my bedroom. :P
The first net I listened to is a weekly net for disabled operators, and they do trivia during their check-ins. I like that! Listening to their conversation reminded me of why I want to license in the first place–community.
With the default antenna, fairly clear, strong signal (power?receive meter all the way top top) with some static. The signal is mostly consistent with slight dips in and out in the meter. Switch the yagi? Still very clear, strong signal, with even less static. And no diipping up and down on the meter, just strong all the way through!
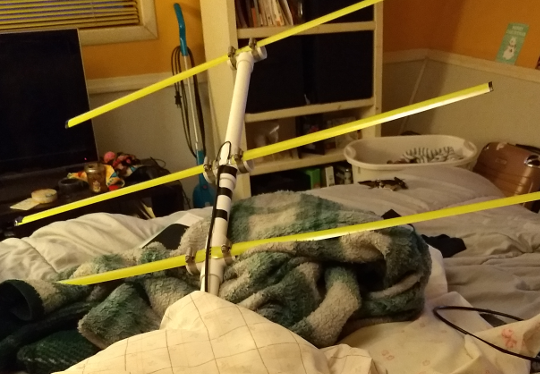
I got tired holding the antenna though, so I figured out a temporary solution…pile a bunch of pillows and blankets to prop the antenna up.
I was a disappointed listening to the 2nd net after the resounding success of the first one. But I have to remind myself: I normally cannot receive this repeater from my bedroom (although I’ve received it clear enough when outside). With the yagi, I can actually understand what most people are saying, but the noise/interference was too much to handle, and I quit listening.
More thoughts later
I have a lot more thoughts about this antenna, including bits I want to modify/fiddle with, but that’ll have to come in another post. But…
All-in-all, a really encouraging, first major project!